
 By
By 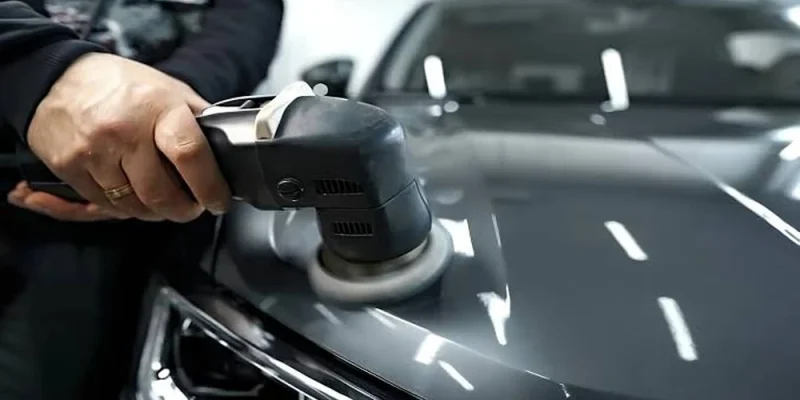
Paint correction is one of the most misunderstood services in the automotive detailing world. Car owners either assume it is something their car desperately needs, or they dismiss it as an overpriced upsell. The truth sits somewhere more practical: it is a specific, technical process that solves a specific problem – and whether your car needs it depends entirely on the current state of your paint.
This guide cuts through the confusion. We cover what paint correction actually does, the myths that cost car owners money and time, what the process looks like in practice, and how to decide if it is right for your vehicle right now. You can also check out Springs Detailing’s comprehensive resource on Paint Correction Explained for a professional detailer’s full walkthrough.
The 60-Second Version
What it is: A machine polishing process that removes a controlled amount of clear coat to eliminate surface defects – swirl marks, light scratches, water spots, haze.
What it is not: A coating, a product, a magic fix, or a permanent shield against future damage.
Who needs it: Any car owner whose paint looks dull, hazy, or swirled in direct sunlight – or anyone preparing to apply ceramic coating or PPF.
Cost range: $150 (enhancement detail) to $1,500+ (full multi-stage correction on a large vehicle).
5 Myths About Paint Correction That Keep Costing People Money
Myth 1: “A good wax will fix my swirl marks”
Wax and paint sealants fill surface imperfections temporarily – they mask swirls rather than removing them. Once the wax wears off (typically within weeks to months), the swirls are fully visible again. Paint correction is the only way to actually remove them. Wax applied after correction is a good protective measure; wax applied instead of correction is a temporary cosmetic cover-up.
Myth 2: “Any detailer can do it”
Paint correction requires proper equipment (a professional DA or rotary polisher, quality compounds and pads, a paint thickness gauge, and an inspection light) and the skill to use them safely. The risk of burning through clear coat – especially on thin factory finishes – is real. An inexperienced operator using an underpowered consumer polisher will either underperform or damage the paint. Always ask a detailer to show their work and their equipment before booking.
Myth 3: “New cars don’t need paint correction”
New cars often arrive from the dealership with swirl marks already on them – caused by improper washing during transport prep, dealer lot detailing, or test drives through automated washes. Many professional detailers recommend an inspection before applying any protective coating to a new vehicle. A new car with swirled paint sealed under a ceramic coating has those defects locked in permanently.
Myth 4: “Paint correction removes all scratches”
Paint correction works within the clear coat only. If a scratch penetrates through the clear coat to the color coat, primer, or bare metal, polishing cannot remove it – only touch-up paint, spot respray, or full panel respray can address it. A professional will assess this with an inspection light and a paint gauge before quoting a correction.
Myth 5: “The results last forever”
The defects that are removed are gone permanently – those scratches no longer exist in the clear coat. But paint correction does not prevent new defects from forming. A ceramic coating or PPF applied immediately after correction dramatically extends how long the results last. Without protection, a corrected car will pick up new swirl marks from the first improper wash.
Paint Condition Guide: Do You Actually Need Correction?
| Paint Condition | What You See | Recommended Action |
|---|---|---|
| Excellent | No visible defects in any light. Paint depth is strong. | Apply protection only (ceramic or sealant) |
| Light defects | Minor swirling visible only in direct sunlight. | Enhancement detail (1-stage light polish) |
| Moderate defects | Clear swirl marks, light scratches, water spot staining. | Two-stage correction |
| Heavy defects | Deep swirling, heavy water spots, visible scratching, haze. | Multi-stage professional correction |
| Severe/oxidized | Chalky, milky, or cloudy paint. Color fading. | Multi-stage + possible panel respray consultation |
The Detailer’s Toolkit: What Goes Into a Real Paint Correction
Understanding the tools helps you evaluate whether a detailer is equipped to do the job properly:
| Tool | Purpose | Why It Matters |
|---|---|---|
| Paint Thickness Gauge | Measures clear coat depth in microns | Determines how much material is safely removable |
| Inspection Light (LED/Halogen) | Reveals defects invisible in normal light | Without it, defects are missed and results are incomplete |
| DA Polisher | Dual-action motion for safe cutting | Lower heat generation, better for most paint types |
| Rotary Polisher | Single-axis for faster cutting | More aggressive; requires experience to avoid burns |
| Cutting Compounds | Abrasives to remove defects | Matched to defect severity – not one-size-fits-all |
| Finishing Polish | Removes compound haze, maximizes gloss | The final step before protection; often skipped in cheap jobs |
| Panel Wipe Solution | Removes all polish oils before coating | Essential – oils mask defects and prevent coating adhesion |
Paint Correction and Ceramic Coating: The Correct Order
One of the most common and costly mistakes in paint care: applying ceramic coating over uncorrected paint.
Ceramic coating bonds chemically to the clear coat and is extremely durable – that is what makes it valuable. But that same durability means any swirls or defects sealed under the coating are now locked in and very difficult to address without removing the coating entirely.
The professional sequence is always:
- Decontaminate and assess paint condition
- Perform appropriate level of paint correction
- Apply panel wipe to remove all residues
- Apply ceramic coating or other protection on corrected, clean paint
Reversing this order – coating first, correcting later – either wastes the coating or forces removal of it. Do it right the first time.
How to Choose a Paint Correction Detailer
- Ask to see before-and-after photos of previous correction work – specifically under inspection lighting, not just finished glamour shots
- Ask what paint gauge they use and whether they measure before starting
- Ask which polisher they use (DA for standard work, rotary for aggressive cutting – both have a place)
- Ask what compounds and pads they work with – name-brand products like Menzerna, Rupes, or Meguiar’s M105/M205 are a good sign
- Be cautious of very low pricing – proper correction on a full vehicle takes 6-16+ hours
- Read reviews specifically mentioning paint correction, not just general detailing work
What to Expect After Your Appointment
Right after a professional paint correction, the difference is typically dramatic – especially on dark-colored vehicles. Under inspection lighting, a properly corrected surface looks almost mirror-like. Under normal daylight, the depth and reflectivity of the paint is noticeably better than before.
You should avoid washing the car for 7-14 days if ceramic coating was applied (allows full cure time). When you do wash, use the two-bucket method or a pressure washer and foam cannon – never take a corrected or coated car through an automatic brush wash.
The investment in paint correction, followed immediately by proper protection, can meaningfully extend how long your car’s paint looks genuinely good – and protect the resale value that goes with it.
Authority Resource: Autopia Car Care – Complete Guide to Machine Polishing

Comments